12 February 2012
Oven-Baked Sweet Unsendable Birthday Plantain
11 February 2012
Baby It's Cold(ish) Outside


09 February 2012
Sun-Dried Tomato Hummus
This is not just any hummus--it's the hummus of the gods. Never have I tasted hummus that I like, or could even find remotely bearable, before this hummus. A vehement hummus hater friend of mine calls it "tolerable" (which doesn't quite count as a "raving review," but I'll take it.)
Kendall shared this fantastic recipe with me. Props to her and her brilliant culinary skills.
Sun-Dried Tomato Hummus:

10 medium cloves garlic
3 cups drained canned cannelloni beans or great northern beans (about 2 15 oz cans)
½ cup sesame paste (tahini)
6 Tbsp extra-virgin olive oil
¼ cup freshly squeezed lemon juice
1 Tbsp plus ½ tsp soy sauce
1 ½ tsp salt
1 tsp ground cumin
1-2 tsp cayenne pepper (depending on preference. I like spicy food, so I use 2 tsp.)
1/2-1 cup sun-dried tomatoes
1-2 Tbsp balsamic vinegar (not pictured, because I ran out. It can be omitted)


Process the garlic cloves until finely minced, stopping the processor occasionally to scrape down the sides of the work bowl. If you are garlic obsessed, like myself, you can add about 20 cloves of garlic. It's not "pleasant breath friendly," but it sure is delicious.

Then you add a whole lot of things that I didn't photograph, but it's fairly simple, and I have faith in your ability to figure it out. Add the sesame paste first and then run the processor at medium speed until well blended. With the motor running, pour the olive oil, lemon juice, and soy sauce through the feed tube, stopping the processor occasionally to scrape down the sides of the bowl. Process until well blended. *Note*: Rather than adding olive oil, I choose to use the oil that the Giada brand tomatoes come in. It taste better and they are pretty darn expensive, so I figure I should get my money's worth.


08 February 2012
Chocolate Peanut Butter Pie
I pinned this recipe for Chocolate Pie a while back, but completely forgot about it until last night. I had a French club event to which I needed to bring a dessert. I wanted to find one that was quick, cheap, and easy (can I get a "that's what she said?"); fortunately, being that I had most of the ingredients already, this pie fit that bill quite well.
Chocolate Pie Crust:
1 7oz package Newman's Own Alphabet Cookies (which are both vegan and slave-free--get it, Newman! For more information on slave-free chocolate brands, click here)
1/3 cup vegan butter (I use earth balance)
Chocolate Peanut Butter Filling:
1 (12.3-oz) package silken tofu, drained
12 oz of chocolate chips (or 1 ½ cups), melted
1/2 cup peanut butter
2 Tbsp non-dairy milk (I used soy)
3 Tbsp powdered sugar
1 tsp cocoa powder
1 tsp vanilla extract
pinch of salt
Pie Toppings
2 tsp peanut butter
2 tsp powdered sugar
Chocolate shavings
Okey doke, for the pie crust:

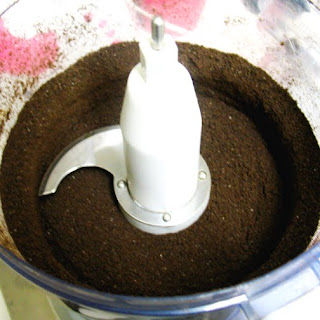
Blend the cookies in a food processor until very fine.

Melt the butter and mix with the processed cookies.

Put into a pie plate and press the mixture in. Let chill in fridge before you put the filling inside.
Onto the pie filling:
Put all the ingredients in a food processor. Blend until smooth.
Pour the mixture into your pie crust
Put in the fridge to chill until you're ready to serve it. Seriously, it's that easy.
Now, onto the toppings:
I tried making coconut whipped cream...and failed epically. It was nothing more than coconut milk with some sugar added. Delicious, sure, but definitely not good enough to use as a pie topping.

And there you have it!
All in all, I thought this pie was pretty good. It might not be able to pass as an exact replica of a non-vegan chocolate peanut butter pie, but it was still rather delicious. Plus, I don't think the goal in vegan cooking needs to be to make something that tastes exactly like its non-vegan counterpart, but just something that tastes wonderful. This pie does that quite well.
05 February 2012
Lemon-Poppyseed Chamomile Tea Muffins
Like Valerie mentioned in an earlier post, we have an epic amount of tea that we are trying to go through before we graduate and leave in May:

Really, we weren't kidding. This is what results when two roommates work at Starbucks for 3+ years and often take advantage of their 1 free box of tea per week but rarely actually make tea.
Anyhow, I've been loooking for ways to use up our tea that don't necessarily mean just drinking it. I was quite excited when my friend posted this recipe on pinterest and I thought I'd give it a whirl, making muffins instead of bread. Unfortunately, when I first made this them, they turned out more like lemon-poppyseed chamomile hockey pucks. No matter how delicious of hockey pucks they were, it was definitely not what I was going for. So, I combined/veganized a few different lemon muffin recipe I found online, added poppyseed and chamomile tea, and ended up with this wonderfully delicious result.
Lemon-Poppyseed Chamomile Tea Muffins:
2 cups all-purpose flour
1/2 cup white sugar
2 teaspoons baking powder
1/2 teaspoon salt
Zest from 1 lemon
3 Tbsp lemon juice
1 cup milk
1/2 cup chamomile tea, steeped dark and cooled (3 bags)
1/3 cup vegetable oil
1/4 cup applesauce
2 Tbsp poppy seed
1 1/2 tsp vanilla
1 1/2 tsp cinnamon
Lemon Glaze:
2 Tbsp agave nectar
1 Tbsp lemon juice
1 Tbsp chamomile tea
1 tsp powdered sugar
Zest from half a lemon
Directions:

Now, zest/juice your lemons. For the muffins and the glaze, you'll need in total zest from 1 1/2 lemons as well as 3 Tbsp lemon juice.
Next, combine flour, sugar, baking soda, and salt in a bowl.

Mix the rest of the ingredients in a separate bowl.
Add the liquids ingredients to the dry ones and mix with a wooden spoon.

Pour batter into muffin tins, filling each one a little 3/4 of the way.
Bake at 375 for 20 minutes (or until you insert a knife and it comes out clean).


Take your muffins out of the oven and pour some glaze over each on. I cut a slit in each of my muffins with a knife so the glaze would sink into the center. Let cool before removing from muffin tins.


